Guides
Travel Photography Tip #4: The Rule of Thirds
Taking travel photographs used to be easy. We just pointed the camera and shot. But now that our standards are higher, we need to use what’s known as the “rule of thirds” so our photo composition is more pleasing to the eye.

Taking travel photographs used to be easy. We just pointed the camera and shot. The pictures didn’t always end up looking good but they were physical reminders of the trip we took. Now that our standards are higher, we need to use what’s known as the “rule of thirds” so our photo composition is more pleasing to the eye. In this article, we’ll explain just what that rule is all about.
Ever since digital photography has taken off, we have been able to immediately see if the picture is good or not. Our expectations have been raised so much with all the high-quality pictures online. Let’s look at what the rule of thirds is and how you can best apply it to make your travel photography really stand out.


Composition
First lets understand what composition is and how it makes pictures more appealing. Composition is arranging the elements of a picture so they are most engaging to the viewer. So you want to frame your photographs in a way that more people will find it interesting and enjoy looking at it. That’s what the whole idea of photography is, making it look neat so people will want to view it.

Rule of Thirds
The rule of thirds is a standard way of composing your photographs where the picture is divided up into thirds vertically and horizontally. These guidelines are not really there but you can mentally use them for reference when lining up your shot. By dividing up the screen we can now place crucial elements in the intersecting areas. These lines signify places where visually stimulating pieces are placed.
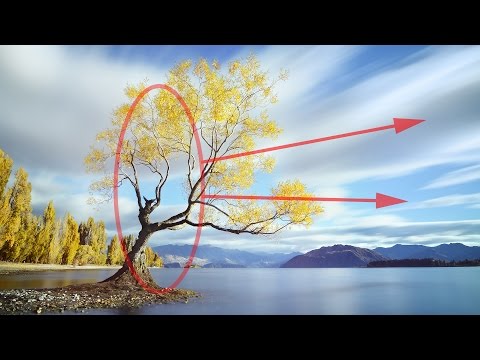
If you have a landscape picture with trees and a barn, you’ll want to take the picture from a vantage point where the barn and trees are in different thirds. Doing this will make the picture more visually favorable and therefore a better travel photography.

Examples
A simple way to understand this principle is to never center your subject in the frame. Instead, put your subject on one of the thirds horizontally, so they are off-center and the picture has more depth. Or, if you are shooting a landscape, try not to split the screen in half by the horizon, instead put it on a third. By dividing the photo into thirds, you make it more appealing and visually attractive.


Fortunately, most cameras nowadays have a grid function, which superimposes a grid over your viewfinder or LCD screen so you can properly line up the shot. Using the grid is the easiest way to train your eye to think in the rule of thirds.
When you are about to take a travel photo, its important to understand what the subject is and what the key points of interest are. Where should you place these elements in the picture so it’s most favorable and looks the best? This is what using the rule of thirds to take a fantastic photo is all about.

When you are out and about, try seeing things in the rule of thirds and line up your eyes as if you were framing up a pic. Being a photographer isn’t too hard as long as you follow some pretty easy steps. Take your time and don’t rush the shot, it’s supposed to be your memory so make it count.