
Uncategorized
Finding Pet-Friendly Lodging: What to Check Before Booking


Finding a place to stay with a pet can feel like a puzzle. Some accommodation welcomes animals warmly, while other properties allow them only in certain rooms or with extra conditions that are not obvious from the listing. A booking that looks perfect can become frustrating if the rules turn out to be different on arrival. Careful checking before you pay helps avoid disappointment and protects the animal from being left in a strange place without the comfort of a familiar routine. This article explains what to look for and how to ask the right questions before confirming a stay.
Read the policy carefully
Start with the official policy rather than a summary. Many properties list a pet policy in their house rules or in the frequently asked questions. Look for the kinds of animals accepted, since some places welcome dogs but not cats, and others accept only small breeds. Check whether there are limits on the number of animals or their weight, and whether any breeds are excluded. Note whether a fee applies, how it is charged and whether it is refundable. If the policy is unclear, do not assume that a pet is allowed. Policies can also change between bookings, so a quick check on the day before arrival is sensible. Send a short written message to the host or hotel and ask them to confirm in writing before you book.
Ask about the practical details
Policies rarely tell the whole story, so ask practical questions. Find out whether the animal may be left alone in the room, and what happens if it barks or becomes anxious during a short absence. Ask whether there is a fenced area or a nearby green space for toilet breaks, and how far the closest walking route is. Check whether the furniture is covered or whether the host expects pets to stay off the beds. Ask about cleaning arrangements and whether a sitter or dog walker can be arranged through the property. Some owners also ask whether the property has an outdoor area that is safe for a pet when the room is empty. Readers may also want to visit Wafnews.com.
Check the surroundings and the rules outside
The property is only part of the picture. Look at the local area for nearby parks, trails and quiet streets where the animal can exercise. Check whether the beach or lake you plan to visit allows dogs at the times you intend to go, since many public areas have seasonal restrictions. Read any local rules about leashes and waste disposal, because fines can apply in some places. You can also visit FamilyFella.com for more reading. If the animal needs a vet during the stay, find the nearest clinic and save its number in your phone before you travel. Check, too, how far the nearest shop that sells pet supplies is, in case something is forgotten.
Confirm the booking in writing
Once you have answers, get them in writing. Save the confirmation email, any messages from the host and screenshots of the pet policy as it appeared when you booked. If the property later changes its rules, these records can help you resolve the situation politely. Keep a copy of your pet’s vaccination records and microchip details in case the accommodation asks for them at check-in. Some hosts also require a short agreement about damage or noise, so read any document carefully before signing. For a related read on this site, see Keeping Important Travel Documents Organised.
A pre-booking checklist
Work through these points before you pay:
- The policy confirms the type and number of animals allowed
- The fee, its amount and its refund terms are clear
- You know whether the animal may be left alone in the room
- Nearby parks and trails suit your animal’s exercise needs
- Confirmation and host messages are saved in writing
If anything about the policy is uncertain, choose another property. A stay where everyone is welcome is far more relaxing than one that depends on luck or a friendly host.
Finding pet-friendly lodging takes a little more time than booking a standard room, but the effort pays off. Read the policy in full, ask practical questions, check the surroundings and keep a written record of every agreement. When you know exactly what to expect, you can focus on enjoying the trip, and the animal can settle into a new place with the reassurance of a clear, well-planned stay.
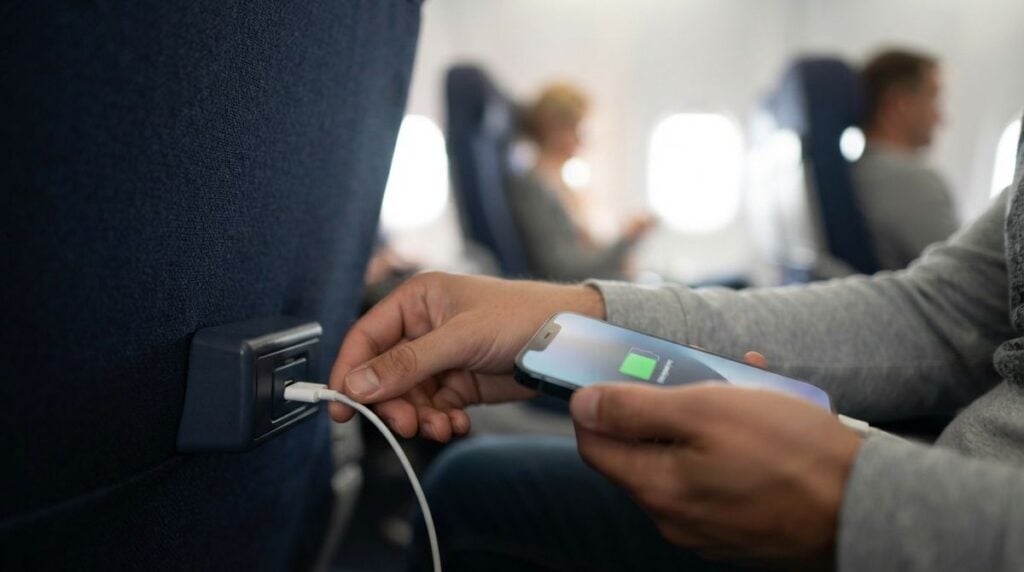
Passports, visas, tickets and booking confirmations are the quiet heart of any journey. When they are easy to find, a trip feels smooth and manageable. When they are scattered across pockets, phones and emails, even a short holiday can become stressful. Many adults who are travelling more in mid-life discover that a simple system for documents saves time, reduces worry and helps them respond calmly if something goes wrong. This article describes a practical way to organise your paperwork before and during your trip.
Creating a single master folder
Start by gathering every document you will need into one place, whether that is a physical folder or a digital one. Typical items include your passport, any visas, travel insurance details, flight or train confirmations, accommodation bookings, vaccination records if they are required, and the contact numbers of people you may need to call. Having everything in one folder means you will not spend valuable minutes searching when you are tired or in a hurry.
Readers may also want to visit Estate-link.net. Many travellers keep the originals in a clear wallet and store scanned copies in a secure digital folder. The digital version should be protected with a strong password and should be accessible even if your device is lost, perhaps through a trusted family member who has been given access in advance. Keep the system simple enough that you can follow it without thinking.
Making copies you can actually use
Scanning or photographing your documents is one of the most useful habits you can build. Take clear images of the photo page of your passport, the front and back of any card you may need, and each booking reference. Store these copies in at least two places, such as a secure cloud folder and an email sent to yourself, so that you can reach them even without your usual device. Check that the images are readable, because a blurred copy is of little use.
Keep a separate printed set of key documents in your luggage, stored apart from the originals. If your phone is stolen or the battery dies, a paper copy of your accommodation address and emergency contacts can be a lifesaver. Write the most important numbers on a small card as well, so you are not depending on a single device for communication. Store the card in your wallet alongside your identification.
Keep the card and the following items together:
1. Your emergency contact numbers.
2. Your accommodation address.
3. Your insurance policy number.
4. A note of your next departure time.
Protecting documents while you travel
Carry your passport in an inside pocket or a zipped section of your bag, and avoid leaving it in a jacket that might be hung on a chair or taken off in a crowded place. Use a hotel safe or a secure locker when you are not carrying your documents, but keep a copy of their location in your notes. Many people feel uneasy about leaving items behind, so choose a method that you trust and check it each time you leave a room.
Be cautious about sharing photographs of your documents on social media or with strangers, because identifying details can be misused. If you need to send a document to someone for a legitimate reason, use a secure channel and confirm the recipient first. When in doubt, consult the official guidance from the authorities of the country you are visiting, and speak to a qualified professional if you are unsure about visa or entry requirements, since rules change and general advice cannot replace official information.
Preparing for a lost or stolen document
Losing a document can be upsetting, but a calm plan makes the situation far easier to manage. First, find out the contact details for your country’s representative overseas and note them in your folder. Second, check whether your travel insurance includes support for lost items, and keep the policy number with your documents. Third, make a note of the steps required to replace each item, so you do not have to search for them while stressed.
It helps to record the details of each document in a single list, including the issue date, the place of issue and the reference number. You do not need to store every number on your phone, but you should know where to find them quickly. You can also visit Wheon News for more reading.
Organising documents for your next trip
After each journey, review your folder and remove anything you no longer need, such as an old boarding pass or an expired booking confirmation. Check the expiry dates on your passport and any other identity documents, since some countries require a minimum period of validity beyond your intended stay. Renew anything that will soon expire well in advance, because official processing times can be longer than expected.
Set a calendar reminder to review your folder once or twice a year, even when you are not travelling. Update your emergency contacts and make sure your digital access still works. For a related read on this site, see Learning Basic Phrases Before a Holiday Abroad. Keeping your documents organised is a small task that pays off every time you leave home.
A well-organised travel folder brings quiet confidence to every journey. It allows you to focus on the places you visit and the people you meet rather than on the worry of what you might have forgotten. Review your checklist before each departure and let it become part of your routine.

Many adults who have spent most of their lives speaking one language feel nervous about using another, even for a short holiday. The fear of getting something wrong can be stronger than the desire to explore. Yet a few well-chosen phrases can open doors, make local people smile, and help you feel far more at ease. This article suggests a realistic way to learn the essentials in a few weeks, even if you have never studied a foreign language before.
Deciding which phrases matter most
Begin by listing the situations you expect to face. You will probably need to greet people, ask for directions, order food, buy tickets, ask about prices and say thank you. You may also need to explain an allergy or ask for help in an emergency. Write these situations on a single page, then find the phrases that cover each one. Keeping the list short means you can focus on learning what you truly need.
It is tempting to memorise long sentences, but most conversations on holiday are short and simple. A polite greeting, a request phrased as a question, and a few key words are often enough. Remember that people in tourist areas are usually used to visitors who speak only a little of the language, so a sincere attempt will be welcomed even when the grammar is imperfect.
Practising little and often
Learning a few phrases works best in short sessions spread across several weeks. Ten minutes a day is more effective than an hour once a fortnight, because the brain needs repetition to store new sounds. Say each phrase out loud, not just in your head, and try to link it to a picture or a real situation. Readers may also want to visit casonestateapartments.com. For example, imagine yourself at a café counter as you practise ordering a drink.
Use a notebook or a set of cards with the phrase on one side and a pronunciation guide on the other. Many beginners find it helpful to write the phrase phonetically, using familiar English sounds to approximate the foreign words. Read it aloud, record yourself if you can, and compare your version with a native speaker’s recording. Small improvements add up quickly over time.
A simple weekly practice plan could look like this:
1. Revise the phrases from the last session.
2. Learn one new greeting or question.
3. Say the phrases aloud to yourself.
4. Try one short real conversation.
Using technology and books wisely
Language learning tools can be very helpful, but they work best as a support rather than a replacement for conversation. You can also visit weborizon.info for more reading. Many public libraries also lend phrasebooks and audio courses at no cost, which is worth checking before you buy anything.
Be cautious about translation tools that give you a single word without context. A word can have several meanings, and an incorrect translation may cause confusion. When you are unsure, look for a second source and compare the results. If you plan to use a translation application during your trip, download any offline packs before you leave, because mobile data can be expensive or unreliable abroad.
Speaking with confidence on the day
On arrival, start each conversation with a greeting in the local language, even if it is only a single word. This small gesture signals respect and often leads the other person to slow down and speak more clearly. If you do not understand a reply, politely say that you are still learning and ask them to repeat it slowly. Most people appreciate the effort and will often try to help.
Non-verbal communication can also carry a great deal of meaning. A friendly expression, a clear pointing gesture and patient listening can bridge many gaps. Carry a small card with the address of your accommodation and the name of the place you are going, so you can show it to a taxi driver or a passer-by. Pointing to written words is often more reliable than trying to pronounce a difficult place name.
Learning from common mistakes
One common error is trying to translate sentences word by word from your own language. This often produces phrases that sound strange or are simply incorrect. Instead, learn complete expressions as chunks and use them as they are. Another mistake is avoiding conversation altogether because you fear embarrassment. Remember that a small error is rarely a serious problem, and locals often find the attempt charming. For a related read on this site, see Packing Light for Your First Trip Abroad.
It is also wise to learn phrases for emergencies, even if you hope never to use them. Know how to say that you need help, that you feel unwell, and where to find a pharmacy or the nearest hospital. For guidance on health matters abroad, speak to a qualified professional before you travel, and keep a list of important contacts with you. When you practise these phrases at home, you will feel calmer knowing you are prepared.
With a short list, regular practice and a willingness to smile, you can make a holiday far more rewarding. Make a simple checklist of starter phrases you can carry, and review it each evening during your last week before departure. Confidence grows with use, and each small conversation will show you how much you have already learned.
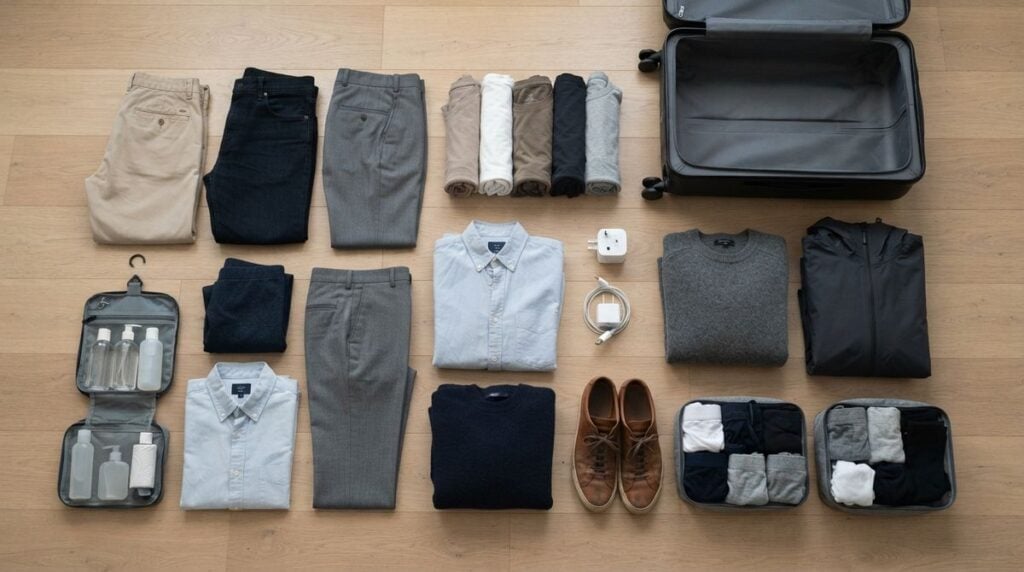
Packing for a first trip overseas can feel like preparing for a small expedition. Many adults who are starting to travel in mid-life fill a suitcase with everything they might possibly need, then struggle to carry it up a staircase or lift it onto a train rack. The truth is that lighter luggage makes travel calmer, cheaper to manage and far more enjoyable. This guide explains how to plan a packing list, choose the right bag, and avoid the common mistakes that beginners make.
Start with the length and type of trip
Before you open a drawer, think about where you are going and what you will actually do there. A week of city sightseeing calls for different clothes than a fortnight of hiking in the hills or a few days of visiting relatives. Write down the main activities, the typical weather and the types of place you will stay, such as a guesthouse, a hotel or a rented flat.
It helps to imagine each day of the trip in detail. Often you will find that you need far fewer items than you first thought.
Choose a bag you can carry comfortably
The size of your bag shapes what you put in it. A large suitcase invites you to fill it, while a smaller bag encourages you to choose carefully. Many travellers find that a medium-sized wheeled case with a telescopic handle is easy to manage on smooth pavements, while a backpack suits uneven streets, stairs and public transport. Think honestly about how far you will walk with your luggage each day before you decide.
Test the bag at home before you leave. Lift it, carry it for a few minutes and try to climb a flight of stairs with it. If it feels heavy after a short walk around the house, it will feel much heavier after a long day in a new city. Remember that most journeys involve more lifting than you expect, including getting on and off trains, buses and sometimes ferries.
Before you leave home, check these points:
1. Can you lift the full bag onto a shelf?
2. Does it have a handle you can hold comfortably?
3. Is it small enough for the transport you plan to use?
4. Does the zip close without strain?
Build a packing list you can trust
Once you know the trip and the bag, create a list of essentials and check each item against your plan. A sensible starting point includes a few days of underwear and socks, two or three tops that mix together, one pair of comfortable trousers or a skirt, a warm layer for cooler evenings, and shoes you have already worn in. Add a small first-aid kit, your regular medicines in their original packaging, and a copy of any important prescriptions.
Many beginners pack for every possible situation, which leads to unused clothing and heavy bags. Readers may also want to visit studioroom906.com. Instead, choose items that work in several combinations. A single dark jacket can go over a dress, a shirt or a jumper. Neutral colours allow you to mix pieces easily, so you can create several outfits from a small selection. You can also visit Giraflat.com for more reading.
Packing your documents and valuables
Keep your important papers together in a clear plastic wallet. This usually includes your passport, any visas you need, tickets or booking confirmations, and the contact details of your accommodation. Make a photocopy or take photographs of these documents and store them in a separate place, such as a cloud folder or an email to yourself, so you can reach them if the originals are lost. Tell a trusted person at home where you are going and when you will be back.
Carry only the valuables you genuinely need. Leave expensive jewellery at home, and keep a small amount of cash in a second place in case your main wallet is stolen. A money belt or a neck pouch worn under your clothes can help, but make sure it is comfortable enough to wear all day. If you have questions about insurance or the rules for carrying certain items, speak to a qualified professional before you travel, because general advice cannot cover your personal situation.
Mistakes beginners often make
The most common mistake is packing for the worst case. Many people bring heavy jackets for weather that never arrives, or three pairs of shoes when one reliable pair would do. Another frequent error is leaving packing until the night before, which leads to rushed decisions and forgotten chargers. Begin a week ahead, lay items on the bed in piles, and remove anything that is not essential.
A quieter mistake is forgetting to plan for laundry. On a trip of more than a few days, you can wash a few items in the sink or find a launderette, so you do not need a bag full of clean clothes for every day. Pack a small bag of travel soap and a few plastic clips for drying. These simple items save a surprising amount of space. For a related read on this site, see How to Plan a Scouting Trip Before Buying.
Making packing a calm routine
Packing well is a skill, and like any skill it improves with practice. After your first trip, write down what you used and what you never touched. Keep this note with your packing list so that next time you start from a better place. Over time, you will develop a standard list for different types of holiday, which makes the process faster and less stressful.
If you are looking for a simple printable checklist to start from, adapt the items to your own needs. Keep your bag by the door a day before you leave, and check it one final time with a fresh mind. A light bag will feel like a gift.

Finding Pet-Friendly Lodging: What to Check Before Booking

Keeping Important Travel Documents Organised

Learning Basic Phrases Before a Holiday Abroad

Packing Light for Your First Trip Abroad

How to Plan a Scouting Trip Before Buying a Second Home

How Managed IT Services Can Help Scale Your Business

Scaling Securely: How an MSSP Supports Your Business Growth

How to Build a Portable Business and Beat Travel Fatigue

Designing Resilient Business Systems for Long-Distance Travel

How AI Is Changing B2B Software
-
 Destinations2 years ago
All-Inclusive Resorts Outside The Caribbean!
-
 Destinations2 years ago
Touring Nashville!
-
 Destinations2 years ago
Safe Travel Spots For Travel Currently
-
 Destinations2 years ago
Stay With The Animals At These Awesome Hotels
-
 Destinations2 years ago
The Best Cruises For Every Family Type
-

 Destinations2 years ago
The Cheapest Travel Destinations in the World in 2020
-
 Destinations2 years ago
Cheapest Caribbean Destination: Punta Cana VS Cancun
-
 Featured2 years ago
How To Make A Healthy Gas Station Meal